


TIPS & TRICKS | Planning Your Own Kitchen
- Jen Fletcher
- Sep 13, 2022
- 8 min read
Updated: Sep 14, 2022
Designing your own kitchen sounds pretty daunting. As much as it would be nice to impress people with my kitchen design skills and pretend that it is a dark art, I won’t, I will instead share some of what I learnt from doing it. And just to be clear, I am not throwing shade at anyone who designs kitchens, it is not easy, a lot of effort and thought goes into it, but I just want to show people it’s not quite as scary as you may think.

Firstly why did I take this on? The honest answer is; I had such specific ideas about what I wanted, that it didn’t exist in my price bracket. I visited a kitchen showroom and when I gave my budget as £20k including a utility area and fitting, the reaction on the designer’s face made me want to crawl back out of there immediately. £20,000 is A LOT of money in my world and yet I left feeling embarrassed that somehow this was not much. I get it. I was asking for a kitchen above my budget.
Being the ultra-nerd that I am, I set to it and began researching everything about kitchens. Materials, planning, flow, storage, inspiration pictures, in no time I was creating libraries of information, considerations, and samples and thought, do you know what? I’ll do it. I was project managing for a corporate company at the time but thought I can take this on too.
I’ve tried to summarise all of this information as best I can, picking out what I feel are the key points to remember and where you should spend your time and/or money. Some of this may be super obvious, some you may not have realised, but I hope you take something from this even if it is just confidence and reassurance that it is possible to plan and design your own kitchen. My warning before you read on; this is not primarily about saving money, yes I saved money doing it this way but I also had to make sacrifices. This blog is more about alternative approaches and ways of getting the kitchen you want.
Trades and Trade Offs
One option is to get yourself a good joiner or cabinet maker. I found a semi-retired joiner who made kitchens all his life and was now only taking on 2 projects each year. Look for recommendations on sites such as Next Door or ask friends and always look at their previous jobs and references so you can check with previous clients what their work was like. Don’t skip this step, it’s important so it’s worth making this effort. This option ended up being much cheaper for us, but it isn't always the case it can end up as expensive as the high end kitchen companies so get a couple of quotes.
Having someone personally work on creating your kitchen brings with it a degree of flexibility and adaptability. If you need to change something, for instance add a plug socket into a cupboard or your measurements are out by a few millimetres, a good tradesperson will get stuck in and work it out with you. This comes with a trade-off; time. Your kitchen cupboards are not rolling off a factory conveyor belt, they are being made in a workshop or garage somewhere and it takes time. So it is likely your kitchen will take months, not a couple of weeks and you need to plan for this. Mine took 6 months and despite becoming naturally impatient towards the end, we had factored it in to our plans.
All in the Detail
There are details that make a high-end kitchen stand out. Handles and knobs, plinths, clever storage and worktops are the main factors for me.
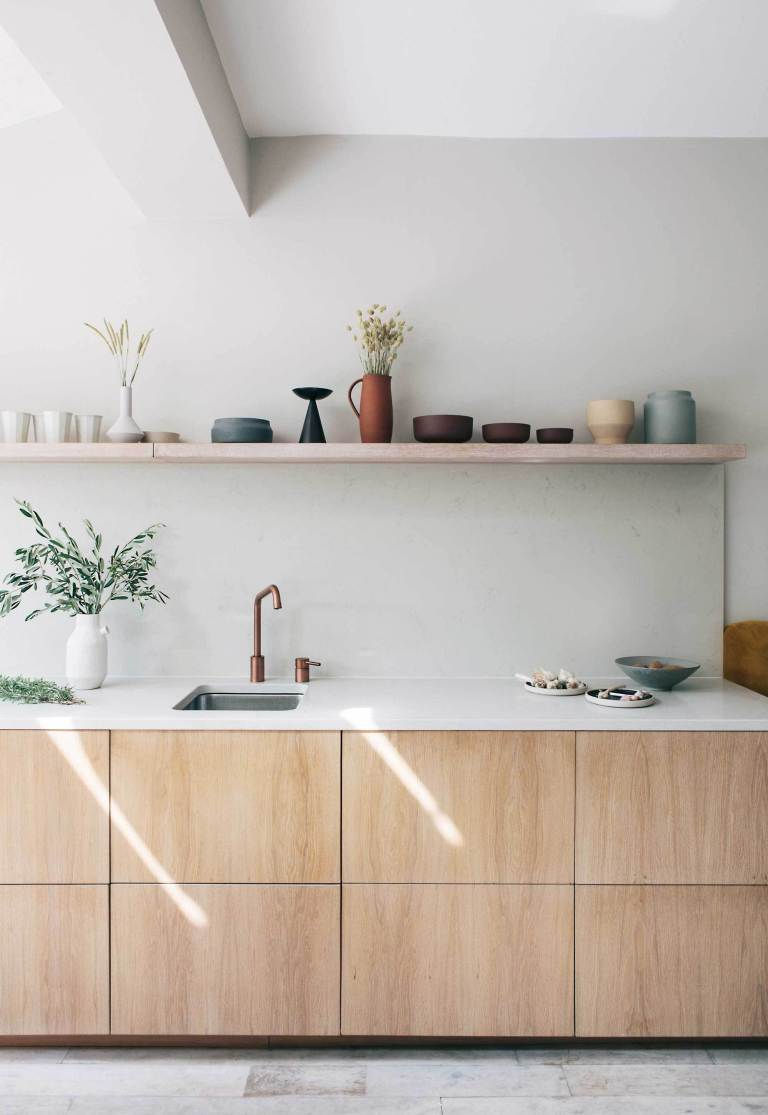
When you’re wondering where to splurge and where to save, I would say that handles and door knobs should not be scrimped on. Not only are you touching them every day, they are constantly being pulled, pushed and even hung on (family life, what can I say!?) so it’s important they look good, feel good and they are robust. It’s obvious when they are not. Alternatively, go handleless, could save money and there are some beautiful scandi and minimal kitchens without handles that look fantastic (an example is further down in this blog post).

Next up is worktop, again its worth spending money on the right worktop. Visit local independent businesses that just deal in worktops, they really know what they are talking about, can advise according to your requirements and are usually cheaper than large kitchen companies – they measure up, cut the tap holes, drainer grooves and install it all for you.
Plinths, for those unsure these are the ‘skirting board’ of the cabinet world. If you’ve never noticed, go have a look at a brochure for a high end kitchen and compare to a low budget, you’ll see that the plinths add a certain quality to the kitchen which you probably wouldn’t have thought about or considered but it makes a real difference.
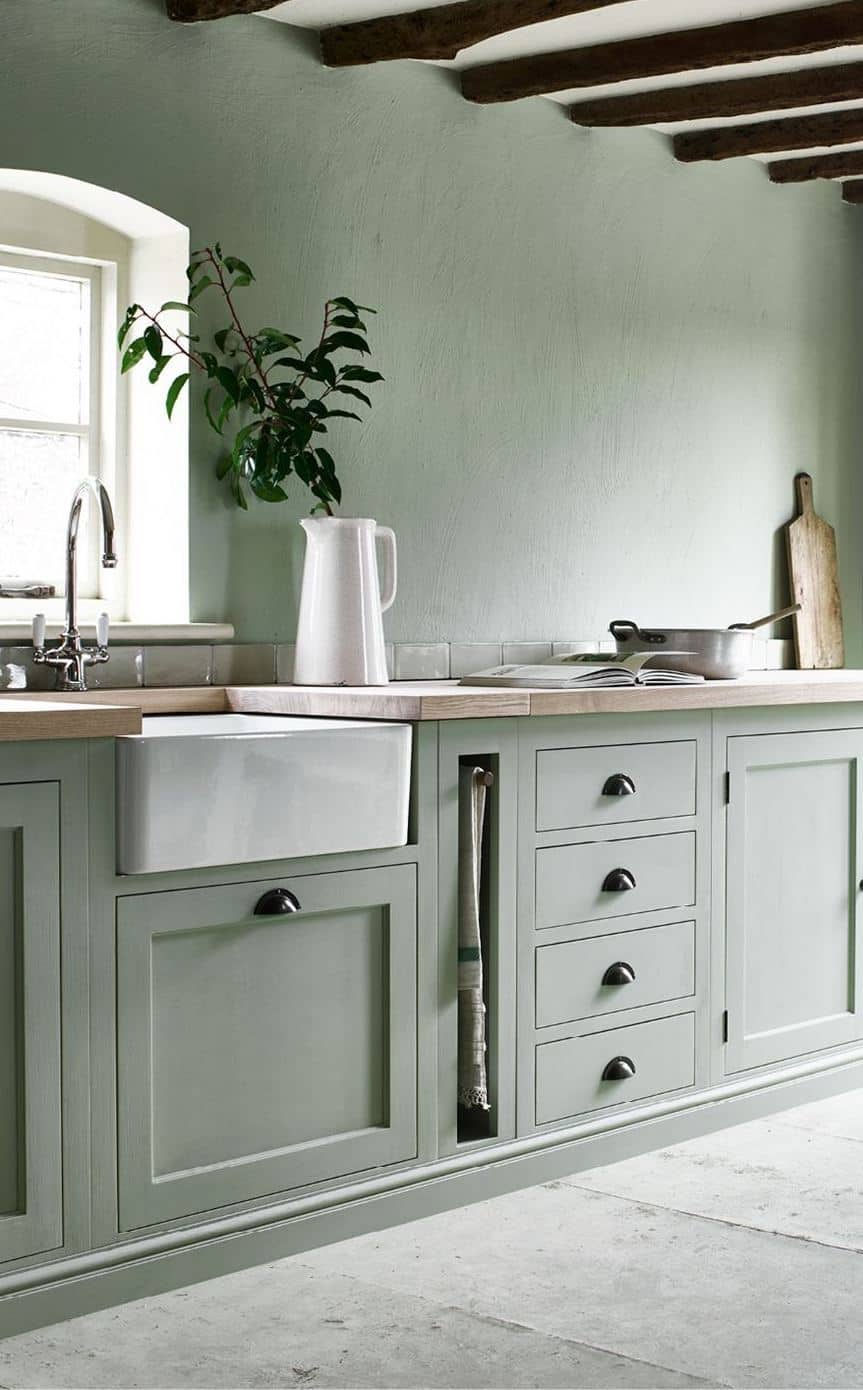
A good kitchen will generally always have clever storage. Pull out spice racks making use of a tight space, larders with door storage racks, pull out baskets, hidden bins, hidden cutlery drawers. All these things aren’t just gimmicks, they can be amazing ways to use, often redundant or hard to use spaces or can enable you to store so much more within the space you have, so it’s a good investment of your money.

Planning and Positioning
So most people will have heard now of the working triangle – a method established in the 1940’s where by you have the fridge, the sink and the oven in a triangle to make travelling between more efficient. Times have changed though. We now have more than a fridge, oven and sink. We have coffee machines, slow cookers, dishwashers and so there’s an argument that ‘zones’ are a better way to organise your kitchen – a prep zone, a cook zone, a wash zone, a storage zone and a serving zone.
My top tips are to draw your kitchen out roughly, many times over, changing the position of cupboards or appliances each time. ‘Step’ into the plan and work out how you move between zones whilst cooking a family meal for instance, clearing the plates at the end of the day or even opening a bottle of wine and ask yourself is the flow right? Are you walking more than 9 metres to get your grubby mitts on that bottle of wine and then to get hold of the corkscrew and then put the foil in the bin? Consider this a ‘kitchen role-play’ but it’s just you. And a piece of paper.
Some of the research into how we use our kitchens may surprise you and it’s a subject during our renovation that caused the most arguments in our marriage (if only I was kidding). People spend around 65% of their time in the kitchen prepping food, not cooking food as you might think. So, if you entertain and want a space where you’re facing people, I would go against popular opinion and position your prep zone on an island or a space where you are facing out into the room. Many people place the hob on the island with a lovely image of stirring the food whilst chatting to their friends or family, but in actual fact only 15% of your time is spent cooking. Which therefore leaves around 20% of your time cleaning and clearing away after mealtimes, and I don’t know about you, but that’s quite a significant amount of time so its worth making it as efficient as possible.

One way to make the clearing time efficient is having a line between the prep zone, bin, sink and dishwasher. So, for example I designed our island with a prep zone to the left facing out to the room. Underneath the prep zone is a bin within a pull-out cupboard, in the middle is a sink and to the right a dishwasher. The idea is I prep, then scrape peelings or leftovers etc into the bin below, then I rinse in the sink to the right, and then it gets placed into the dishwasher to the right again. The most used crockery is directly behind the dishwasher to make putting it all away less of a chore.
Alternatives and Half Way Houses
So for whatever reason, you don’t want to do this from scratch or the joiner is not within your budget. Have you considered buying an Ikea kitchen and pimping it up? If I take on another project (more than likely!), I'd consider going down this route myself. Either go online or in to an Ikea store with your measurements (in mm) and ask one of the lovely kitchen planners to help you. My advice would be to still follow my previous advice (Yeah I know, weird sentence) so get your worktop elsewhere, get the good quality knobs, consider different plinths, but buy the carcasses from Ikea and save yourself some money. Install it yourself if you're feeling brave or enlist some help. There are a number of companies who create custom cupboard and drawer fronts for Ikea kitchens, here Custom Fronts created contemporary clean lines in white European Oak giving it a much more expensive look and feel.
In a similar way, if you have your heart set on a DeVol or Humphrey Munson kitchen for instance, pop into a showroom and ask for a quote. Don’t let your budget put you off, be clear though and ask the designers there how you can save money. If they’re a good showroom, they will give you solid advice and help you find a compromise. Again, go find your own worktop and knobs, compare the installation cost with that of a local joiner and that may save you money. You’ll probably have to give up some of that clever storage we spoke about but you may feel that is a small price to pay to get your dream look. And let’s face it – they really are beautiful well made kitchens

Order of Events
This can be contentious (as much as a kitchen can be contentious). Which comes first, the flooring, the painting or the kitchen installation? So my view on this is, first flooring, second painting, third installation and fourth retouch paint.
Flooring needs to go in first to sit under your cupboards. How far under you go is up to you. You can save money and not run the flooring completely under and just have your installer tweak the cupboard feet to level them. Or for completeness, or if you think there’s ever a chance of moving/changing/removing a cupboard, floor the whole area.

My second step would be to paint the whole room while the kitchen is not in. Its far easier and quicker to get around the kitchen with your roller that way and it’s also easy to cover the floor from splatters. But don’t be fooled, expect that paint will be scuffed during installation.
Then installation. Kitchen goes in, the worktop company can then come out and get final templates drawn up. Ask them for a temporary board or go get yourself some ply while you wait for your worktop to be fitted.
And finally, as I referred to before, there is bound to be some scuffs, it’s better to expect them than get mad. So a quick retouch once the silicone has dried and dust has settled.
The Downsides and Things to Watch For
As well as the time it will take to have a bespoke handmade kitchen, there’s a couple of last points you need to consider.
Painting – Our joiner painted our kitchen, and if we were to do it all again, I would have asked a professional decorator to do it. I don’t think it was primed properly, so we have areas of high use where it was looking tired after just one year, there’s also wobbly paint lines on internal drawers which, ok, not visible to anyone else, but I know about them.
Project Management – Tag, you’re it! If you project manage your own kitchen, you have to be prepared that you are the co-ordinator, organiser, chaser, moaner, inspector, decision maker and that is A LOT of work. Don’t underestimate this. It is far easier to let a company run the show for you, and that’s what you rightly pay for – they have skills to bring everything together and make your life easier (spoken by a true project manager!).
As I remind any client, you can’t have it all (despite what you hear). There are 3 key factors for any project like this – cost, quality and time. You can not have something cheap, to a high standard and in super quick time. So decide where your priorities are and that will open up the path you need to take.
Comments